Monday, December 19, 2016

Merry Christmas! Plus a Minty Snowmen Recipe....


I can hardly believe Christmas is only days away!  I couldn't let it come and go without wishing everyone a Very Merry Christmas! I hope your holiday season has been special and joyful and fun! This past weekend, I made these little Minty Snowmen, so I thought I'd share the recipe with you in case you need something last minute to make for a holiday event. I just wanted to try my hand at these .... for the little girl in me. Are they perfection? Umm, Definitely Not!  But they were a lot fun and  I did laugh out loud a lot in the process. I will tell you that the other two (that are missing)  were total flops, but they were tasty. I didn't think of taking a picture of those, I'll just let you imagine.

The recipe is from a 2005 Taste of Home Holiday Entertaining Magazine Mini.
Enjoy!

Minty Snowmen
1 Tablespoon Butter Softened
1 Tablespoon Light Corn Syrup
1/2 teaspoon Mint Extract (I used peppermint extract)
1/8 teaspoon Salt
1 Cup Confectioners' Sugar (I sifted it) 
1 Drop of Blue Food Coloring (I used 2)
1 Drop of Yellow Food Coloring
1 Drop of Red Food Coloring (I used 2)
Colored sprinkles and cake decorator candies 

In a mixing bowl, combine the butter, corn syrup, extract and salt. Gradually beat in confectioners' sugar (with the back of a spoon). Knead by hand for 1-2 minutes or until mixture becomes pliable. To 1 tablespoon of dough, add blue food coloring , knead until blending. Add yellow food coloring to another tablespoon of dough and knead. Add red to another tablespoon of dough and knead. Leave remaining dough white. 

Roll white dough into a log, remove one-fourth of the log and set aside. For the snowmen's bodies, divide the remaining log into 8 pieces and roll into balls. For the snowmen's heads, divide the reserved dough into 8 pieces and roll into balls. Stack 1 smaller ball on top of each larger ball. 

Use the colored dough to form hats, scarves and earmuffs as desired. Use colored sprinkles to make eyes, nose, buttons ect. 

Yield 8 Snowmen (in my case 6!)

Merry Christmas Again and Happy New Year!
God Bless Us Everyone! 

Tuesday, October 4, 2016

Autumn Greetings From Queenie's Vintage Finds....


I've been doing a little bit of seasonal decorating....adding a few touches of fall, so I thought I'd share it here with you....I hope you all have a fun and happy harvest season! 
Thanks for stopping by for a visit!


Tuesday, June 14, 2016

A Summer Tradition...

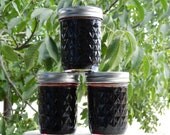
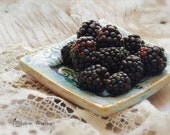
Blackberry Pudding Tarts are a summer tradition for our family, we love 'em and I don't know if it would feel like summer without some. Wild blackberries were recently ready for picking in our area, so I was able to make up a batch of these yummy desserts. I thought I'd share the recipe for these in case some of you might want to make some too....maybe you'll even be able to start a new summer tradition with your family. 


Here's what you will need to make these:

2 (10 oz. pkg. frozen tart shells, there's 8 shells in each package)
2 quarts fresh blackberries (2 ~16 oz packages of frozen thawed can be substituted) but I always use fresh, because we can pick them ourselves and they are available in our area in summertime
1 cup water
1  3/4 cups sugar divided
1/2 cup self-rising flour
1/4 cup butter or margarine
2  1/8 teaspoon vanilla extract, divided
1 cup whipping cream
garnish with fresh blackberries, mint sprigs if desired

1. Bake tart shells according to package directions; cool completely.
Bring Blackberries and 1 cup water to a boil over medium heat. Reduce heat, and simmer 5 minutes or until blackberries are soft.
2. Mash blackberries with a fork; pour through a wire-mesh strainer into a 4-cup liquid measuring cup, using back of spoon to squeeze out 2 cups juice, discard the pulp and seeds. (Boil the juice to reduce to 2 cups if necessary.)
3. Combine 1  1/2 cups of sugar and the flour in a saucepan; gradually add blackberry juice, whisking constantly until smooth. Bring to a boil over medium heat, and simmer 3 minutes or until thickened. Remove from heat. Stir in butter and 2 teaspoons of vanilla.
4. Spoon filling into prepared tart shells. Cool Completely.
5. Beat whipping cream at high speed with an electric mixer until foamy; gradually add remaining 1/4 cup sugar, beating until stiff peaks form. Fold in remaining vanilla. Important Note: Do not beat in the vanilla, it will make the whipping cream break down and fall apart. I've done it before and had to run back to the store for more whipping cream.
Place a dollop of whipping cream on each pudding tart, then put in the fridge, until chilled.

Makes 16 servings

* This is a Southern Living Hall of Fame Recipe from 1993

Enjoy! 

Thanks for stopping by!


Saturday, June 4, 2016

Sharing Photos From Our Vacation...

At the end of May, my husband and I went on vacation to Gatlinburg, Tn and visited the Great Smoky Mountains National Park. We spent an amazing 5 days there and we had a great time. I took over 200 photos while we were there (we made a few videos of the mountains and streams with our camera too)...and I wanted to share some of the beauty of this amazing place with you, for you to enjoy too....


Mountain Video


Grotto Falls (2.8 mile round trip hike, we hiked to it) the trail head is on the Roaring Fork Motor Nature Trail
Outside our hotel creekside in Gatlinburg, Tn.

Listen to the water 

 Riverwalk Gatlinburg, Tn.
 The Village Shopping Area on Parkway Gatlinburg, Tn.


This was the view from our hotel balcony.... rocky creeks seemed to be around every corner up here, we were able to open the window of our hotel and hear the water from inside the hotel room, I loved that.


For more information on the Great Smoky Mountains National Park, you can click HERE
For information about Gatlinburg, Tn. you can click HERE

Thanks for stopping by!